NanEyeC on Teensy 4.1
This project turns an ams-OSRAM NanEyeC, a 1 mm² camera sensor, into a USB camera for a Windows PC. The sensor sits on an ams NanoBerry evaluation board, a Teensy 4.1 microcontroller talks to it, and the PC receives 320 × 320 images at up to 35 frames per second, with Python tools to view and record them. Both the mono and the colour part work; the colour one streams its Bayer mosaic and the PC demosaics it.
Frames keep the sensor's full 10-bit resolution, and what is recorded is always the raw mosaic, never a processed picture. Every frame carries its own exposure, clock and error counters, and a lost or damaged frame is always reported, never hidden.
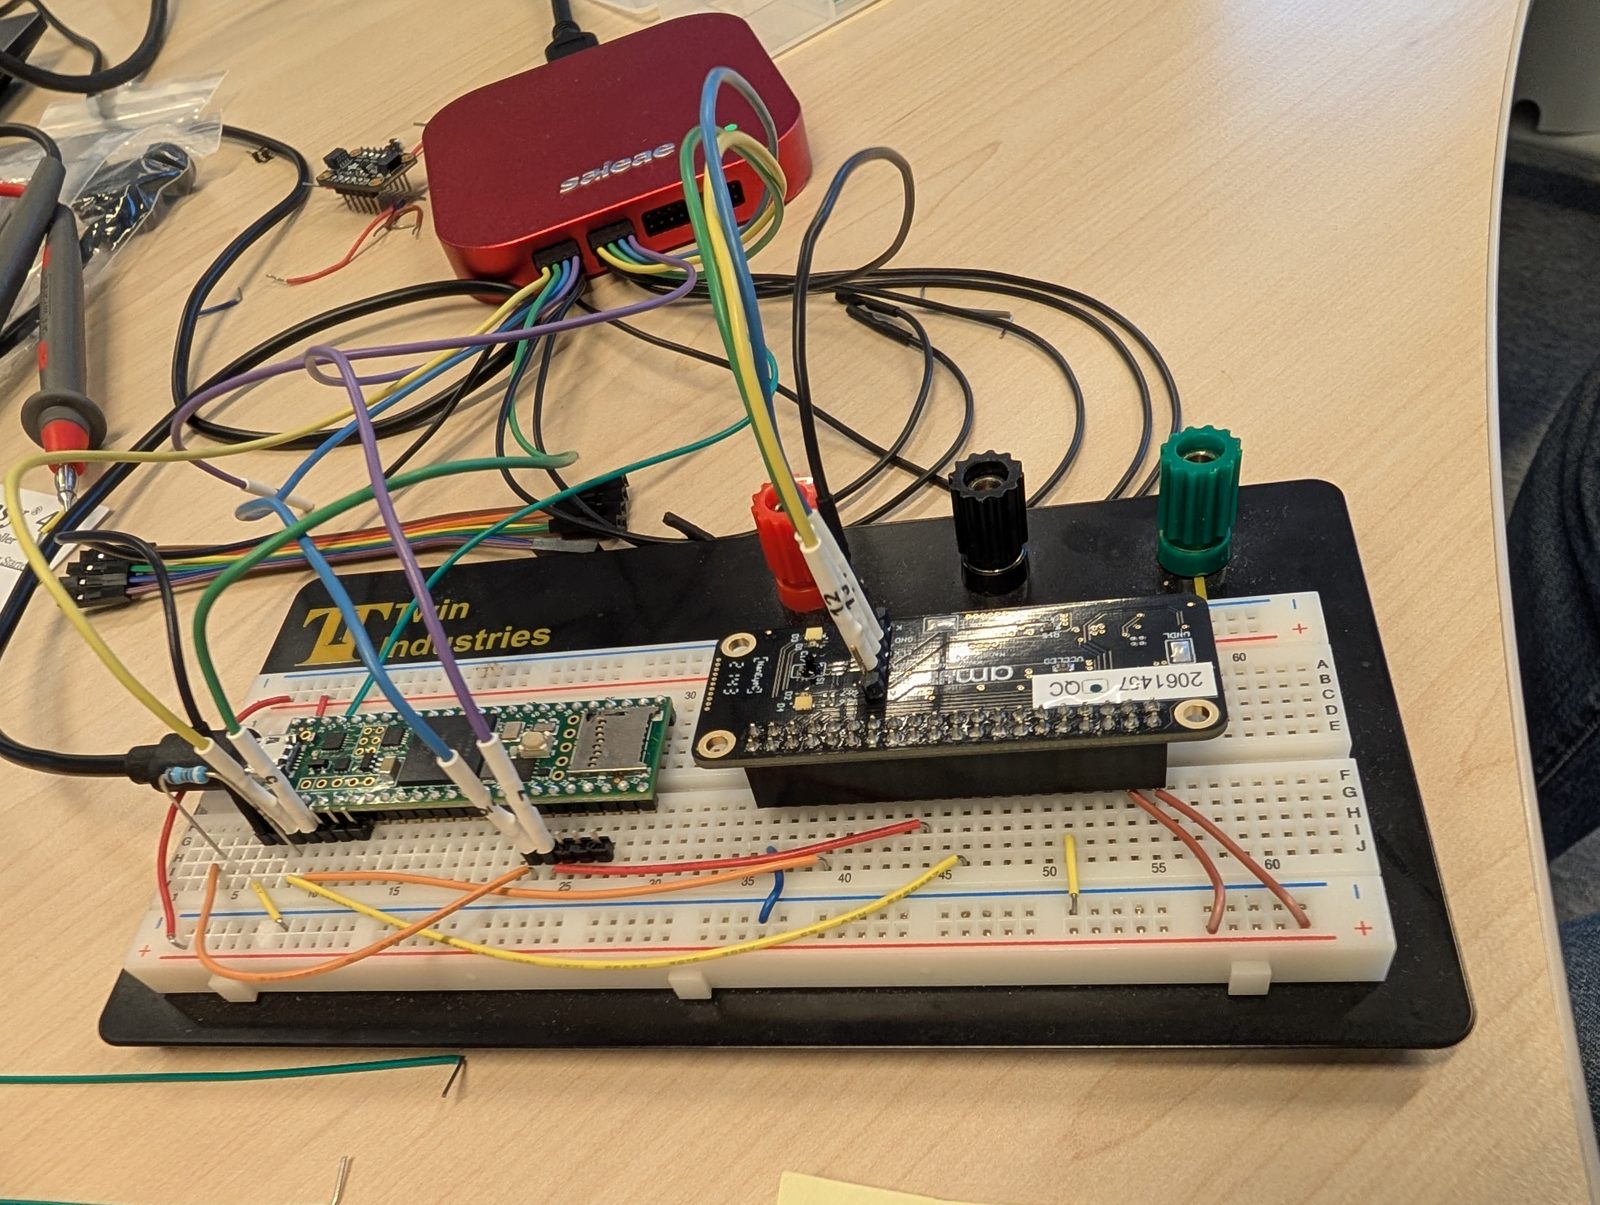
The bench: the Teensy 4.1 (green, left) on a breadboard, wired to the NanoBerry board (black, right) through its Raspberry Pi header. The red box is a Saleae logic analyser probing the link, used during development and not needed to run the camera. Hardware walks through the photo.
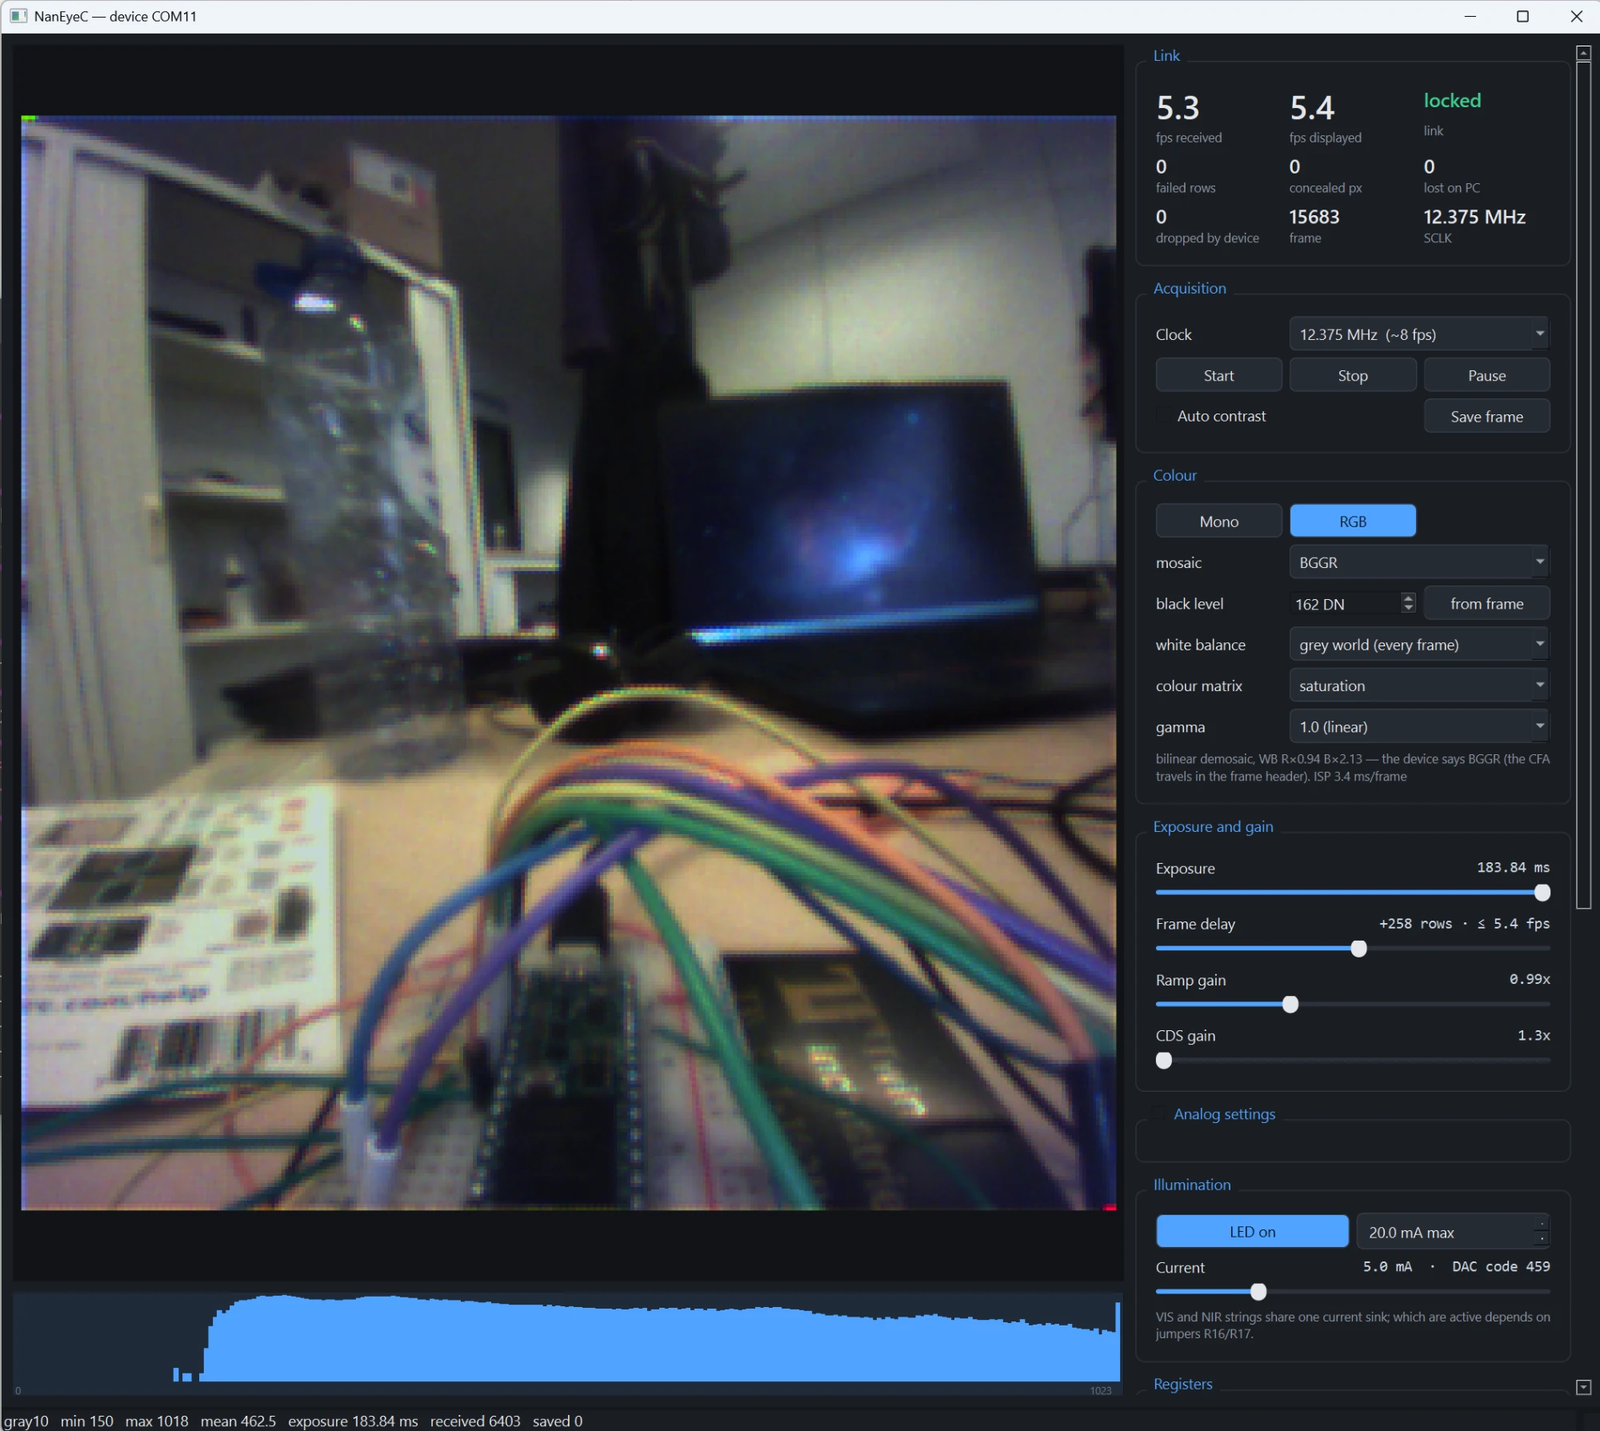
What you get: the GUI streaming from a colour NanEyeC — demosaiced, white balanced and gamma corrected on the way to the screen, at 183 ms exposure and 12.375 MHz. The panels give the link and error counters, the Mono/RGB switch and the ISP, exposure and gain, the LED current, the sensor's registers, and a histogram of the raw 10-bit values.
Status
| Streaming images | working since 2026-09-18 |
| 49.5 MHz link (default) | 35.5 fps; 10 minutes without a lost frame, a failed row or a concealed pixel (how) |
| 24.75 / 12.375 MHz | 17.9 / 8.4 fps, 0 failed rows |
| Error handling | sampling point measured at every start; broken pixel words detected and concealed |
| Exposure control | verified: brightness follows exposure linearly from 1.3 to 102 ms |
| Watchdog | hardware watchdog resets a hung Teensy within 2 s |
| Illumination (the board's LEDs) | working: DAC writes verified on the wire, image brightness linear at 1.98 DN/mA to 20 mA |
| Colour sensor | working: BGGR mosaic confirmed on the bench, carried in every frame header |
| ISP | black level, white balance, bilinear demosaic, colour matrix, gamma — 2.3 ms a frame, against 28 ms available |
| Host software | PyQt6 camera GUI with a Mono/RGB switch, recorder, Python API; 112 automated tests, no hardware needed |
Where to go
| I want to… | Read |
|---|---|
| build one and see an image | Getting started |
| understand the wiring, the board, or why something is wired the way it is | Hardware and bring-up |
| record data or use the camera from Python | Host software |
| change the firmware | Firmware architecture |
| understand the sensor's serial protocol | SEIM protocol reference |
| know why a decision was made | Design record |
| know where the code departs from the datasheet, and why | Datasheet cross-check |
| look up a term (PP, SEIM, training pattern…) | Glossary |
| know how the project was developed and brought up with Claude | How this was built with Claude |
How it works, in one paragraph
The NanEyeC has only four pins: power, ground, a clock input (SCLK) and one data line (SDAT) that works in both directions, taking turns. The host supplies the clock. For most of each frame the sensor sends pixels on SDAT, one bit per clock. Between frames there is a short interface window where the direction reverses and the host can write the sensor's two configuration registers. The Teensy generates the clock and receives the bits with its SPI peripheral and DMA, checks every row, packs the pixels and sends each frame to the PC over USB with a header and a checksum. On the PC, Python code decodes and displays the frames. The SEIM protocol reference has the details.
A note on how this was built
The specification, firmware, host software, tests and these pages were written by Claude (Anthropic's AI model) in Claude Code, which also did the bring-up on the bench, driving the Teensy over USB and a logic analyser through its MCP server. A person did the wiring, made the decisions and caught the mistakes. How this was built with Claude tells that story, including the mistakes.
Almost nothing here was taken on trust from the datasheet. Before any code was written, a logic-analyser capture of a working NanoBerry ↔ Raspberry Pi link was decoded completely. It gave hard numbers for the clock rate, the sampling edge, the register sequence and the timing, and it exposed a defect in that reference implementation worth avoiding. Where measurement and datasheet disagree, the measurement wins, and the datasheet cross-check records each case.
That capture, the datasheets and the board schematic are not in this repository. They
are third-party material and the repository is public. One real row of sensor data is
committed, as firmware/src/golden_vector.h; the on-device self-test and the host tests
check against it. .gitignore lists the files that belong in the local doc/ folder and
where each comes from.
Repository layout
README.md               short introduction
spec.md                 living design record (shown here as "Design record")
docs/                   this site
doc/                    NOT tracked: datasheets, schematic, reference capture
firmware/               PlatformIO project for the Teensy 4.1
host/naneye/            Python package: decoder, transport, viewer, recorder, Saleae client
tools/                  reference-capture decoder, logic-analyser bring-up tools
tests/                  112 tests, none needing hardware
Building these docs
The site is published to https://fiepfiep.github.io/teensy_naneyeC/ on every push that touches the docs.